Receive all updates via Facebook. Just Click the Like Button Below

Powered By | Blog Gadgets Via Blogger Widgets

HomeAboutContact

Friday, June 28, 2013

Fiction Friday - Fortunately

 
         One of my very favorite picture books is Fortunately by Reme Charlip. This is a book that my Mom read to me when I was a child, it was a favorite of my own children and it is always a hit in my classroom.
         The simple book follows the ups and downs of Ned as he tries to get to a surprise party.

Fortunately, Ned was invited to a surprise party.
Unfortunately, the party was in Florida and Ned lived in New York.
Fortunately, a friend loaned Ned an airplane.
Unfortunately, the motor exploded.
Fortunately, there was a parachute in the airplane.
Unfortunately, there was a hole in the parachute. 
The text continues this way with twists that my Pre-kers think are hysterical. The illustrations go between color for the fortunate events and black and white for the unfortunate events.            
            I love this book because my kids and I always find ourselves making our own versions, either just for fun or in response to real life situations.  In Kindergarten, I used the book as a springboard for a silly class book.  Even after our book was completed, the kids kept telling their own fortunately/unfortunately stories. When I was getting my masters I wrote a lesson plan that I loved for a unit on the gold rush.  As a culminating activity for the unit I read the book and then the class worked in small groups to write their own Fortunately books describing the hardships of getting to California and then finding gold. The results were a great review, fun to do, and often resulted in the happy ending of selling jeans or shovels and fortunately making lots of money. I  also used the book when I was a substitute teacher as a fun extra activity (with upper elementary kids).  After reading the book, we would play a cooperative game where we go around the circle and keep adding the next line to the story.  I'd start with something simple such as "fortunately it was time for recess... or fortunately there was no school today...." One final way the book can be used is to focus on something good when something bad happens.  "Unfortunately I broke my arm, fortunately it was my left arm."  My own kids still talk this way sometimes because it can be rather habit forming (and fun).              
            I found several interesting youtube videos relating to the book. There is a youtube video of someone reading the whole book here.  This is a youtube video explaining using Fortunately/Unfortunately in improvisation.  These are my favorite pages because some days are just like this...

Fortunately he missed the pitchfork.
Unfortunately he missed the haystack.


Thursday, June 27, 2013

Throw Back Thursday - Jack and the Beanstalk

I'm joining Cara's Throw Back Thursday Linky Party.

I had so much fun with Jack and the Beanstalk during our Fairy Tale Unit.  We were able to incorporate lots of literacy activities such as comparing different versions of the story and lots of fun retelling.  We also incorporated science (growing beans) and math (measuring with beans) in really cute  and crafty ways.  This was originally posted on March 27, 2012.


This is the Bean Stalk that is in our classroom.  I made it by twisting long pieces of bulletin board paper. I added a giant cardboard boot and used a "snow cover" that I got after Christmas to make the cloud.  The kids made the giant leaves (using tracers).

This is one of my favorite ways to grow plants because the kids can follow the progress of the the roots and sprouts.  The kids put a paper towel in a baby food jar and then a bean and then added water (it is important that just the paper towel is wet and the bean does not sit in water or it will get moldy).  The little castle  and a cotton ball or fluff cloud is attached to a stick (I bought "bamboo" placemats at the dollar store so I got lots of sticks for $1).  They then drew a little picture of themselves that is taped to the jar.  As the bean grows, we wind it around the stick.  So cute!

We also did some Jack and the Beanstalk inspired math that you can read about here.

Monday, June 24, 2013

See You Later Alligator

I sent out these cute thank you notes to my students this year.

I bought these alligators (actually crocodiles) from US Toy Company for $1.48 for 12 (with no shipping cost).
This year I used spray adhesive to attach them to the card (other years I've used glue dots but I didn't have any at home).  Very simple but very cute...especially because my kiddos love Dr. Jean's Good-Bye Friends song that we call See You Later Alligator.  I also include a self-addressed note card, with the promise that I'll write back, to encourage them to write to me during the summer.

I'm linking up with 4th Grade Frolicc's Made it Monday Linky Party.

Tuesday, June 18, 2013

My teacher always says...


One of my very favorite bloggers, Tammy at Forever in First, is having a Linky Party of classroom mantras.  I'm not sure if my kiddos would come up with other things that I always say but I certainly say each of the following several times a day.

I teach preschool and I am the best swing pusher.  The kiddos in my class usually remember to say "May I please have a push?" but I still say this several times a day to the younger kids.


I say this when a kid shares something they have accomplished.  For example, "Look, I just tied my own shoe." A long time ago I read that it helps a child to value intrinsic motivation if we say "You must feel proud." rather than "I'm so proud of you." I like the idea of helping kids recognize that they don't need adult validation to feel good about themselves.


I often say this to my class when they do something well.  Either I will be "shocked and amazed" or we will share something we are learning with a visitor to "shock and amaze" him or her or I will tell the kids that their parents will be "shocked and amazed" by what the kids are working on.  When we wrote our class book about a visiting leprechaun, the kids insisted that the leprechaun would be "shocked and amazed!"  

I just started saying this after Tammy blogged about it.  My kiddos really seemed to "get it" when I said this when they were tattling. 
I know this doesn't really make sense but it seems to help my little ones not blurt out what they are thinking.  We "think inside our own brains of something we are thankful for" during our moment of silence before snack and other times when I want the kids to quietly think about something. I always let the kids share what they were thinking about later.
I like this so much better than repeatedly saying "be quite."  I try to say it once and then quietly wait for the kids to get their coats and line up.  I can now just stand at the front of the line and they know it won't move until the line is quiet and everyone is looking at me.

I could probably go on and on but I want to read what other teachers say everyday:)


Saturday, June 15, 2013

Our Water Week in Pictures

Last week was Water Week at our preschool bridge camp.  Here are some of the fun things we did:


Bubble Snakes ... These snakes were really fun (although I did most of the assembly).  For each child, I cut the bottom off of a water bottle.  I then put a section of a sock over the open end and taped it on with duct tape.  It is very easy to make this with the toe part of a sock (the kids could have done it themselves with a rubber band) but, because I just used small pieces of the sock, I was able to make 37 snake blowers with 3 tube socks. We put dish soap with a little bit of water on trays that the teachers held.  The kids dipped the sock covered end into the soap and then gently blew into the mouth of the bottle. The kids LOVED making long bubble snakes. We only had one child who sucked in a mouthful of soap (or at least only one for whom tasting the bubbles ruined the whole experience).


A Wonderful Water Wall ...it was a favorite activity every day.  Read more about how I made it here.


A drive through bike wash ... rumor had it that "the cleaned bikes went faster! 
Water beads...the kids loved playing with these water beads that I bought in the floral section of  Dollar Tree.  On the last day we were allowed to squish the beads until they broke (also fun).
Cork Boats... We "sailed" our simple cork boats in canals in our sandbox, a little pool, and in plastic gutters. Read more about our cork boats here.


It was a great week!

Friday, June 14, 2013

Cork Sailboats

 We made simple cork sailboats last week.
 The kids started by wrapping rubber bands around 2 corks.  They then decorated little sails that we had cut out from construction paper.  We laminated the sails (since we wanted to be able to play with them for several days) and then stuck a long plastic toothpick through the sail and between the two corks.  Simple!
Materials for sailboats...corks, rubberbands, long plastic toothpicks, and crayons for decorating.
The fun began when the children began playing with their sailboats.  Some tested their boats in our little pool,
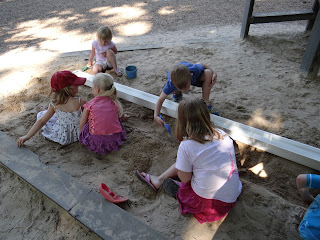
others worked together to try to make a tin foil river in our sandbox. The river probably suffered from having too many engineers and workers (there were quite a few holes in the foil:).  

That night I went to Home Depot and bought two 10' plastic gutters (they were less that $6 each).  My co-teacher had the same idea and also bought end pieces for the gutter she bought. We put the one with end caps in the sandbox in a ditch that the kids built.  


 We attached the other two together with clips and the kids raced their boats.
It would have worked better if we had a hose.  Instead the kids had to keep bringing the water from the end bin (which was lower) back to the start bin.
This is an assembly line to move the water back to the top bin. :)
The kids were excited to bring their boats home to try them in the tub.


Monday, June 10, 2013

Our WONDERFUL Water Wall


         This week is Water Week at our preschool's bridge camp (an optional program between our school's last day and the local school district's last day).  I have been seeing water walls on Pinterest and really wanted to make one.  I originally planned to use a pegboard but decided to use plexiglass instead because I because I wanted a wall that was very portable and able to handle a lot of kids. I started by going to Home Depot and buying a 36"x 48" sheet of plexiglass, clear plastic tubing, and small nuts and bolts. Because I wanted some color and flexibility I  bought pop tubes from Amazon.  I also collected  the adjustable coat rack that I had bought years ago at Target for my pocket chart, zip ties, lots of different sizes of plastic bottles,  funnels, my hot glue gun,  duck tape and my drill.
        I began by adjusting the coat rack to be the right height.  The plexiglass was slightly wider than coat rack but I decided that that would make the board more sturdy.  I propped the plexiglass next to the coat rack and started drilling holes about 1/2 inch below the top of the plexiglass and zip tied it to the rack.  On the sides I drilled holes on both sides of the rack and then attached it with the zip ties.  The plexiglass is easy to drill (I left the protective plastic on until I was all finished).


Tube wrapping around the edge.
I then just started drilling holes and attaching bottles with the nuts and bolts.  I put holes in the bottles with a punch tool.  I attached the tubes to bottles with hot glue (I just put a lot inside the mouth of the bottle) and then wrapped the connection with duck tape (partly just to add color).  Sometimes I cut holes in the side or bottom of bottles, other times I drilled lots of holes in the bottom. My son got involved at one point and brought up a big drill tip (the kind you use for drilling a hole for a door knob) and we put a hole in the middle so we could have one of the tubes go from one side to the other.  We also put large holes down one side so we could wrap a tube around and edge of the the water wall (and the frame).
I tried to have places that the kids could add water at different heights on the board.  I also made several places where water came together from 2 different places and a few spots where the kids could move a bottle to change the direction of the water. The kids LOVED the wall.
They really loved, loved, loved the wall.  I loved that the kids quickly figured out that they could put a cup under one of the places that water came out to collect water and they worked together to "give" each other water.  It was so much fun to see the little engineers following the paths and "experimenting" over and over! Tomorrow we are going to use colored water for a little color mixing fun.


The total cost of the wall was probably $50 (give or take a few dollars because I had some of the materials around the house).  A pegboard would have been cheaper (the plexiglass was almost $30) but I love the fact that the kids interacted as they used both sides of the plexiglass.  Please let me know if you have any questions.
I'm linking up with 4th Grade Frolics' Monday Made It.