Receive all updates via Facebook. Just Click the Like Button Below

Powered By | Blog Gadgets Via Blogger Widgets

HomeAboutContact

Tuesday, October 16, 2012

Boo! Spooky Ghosts


 The director of my Nursery School has always done the most amazing projects with our kids. Every holiday, I still pull out decorations my children made with her (some are over 20 years old!)  Lots of her ideas are found on this blog.  This week I thought I put up some of her Halloween crafts. These ghosts are really easy but SO cute.  Each child is given a meat tray and a big piece of foil that they form into a shape.  The important thing is that the top is rounded.  They then use a second piece to make arms that stick out the side.
Its very easy to work with the foil and it doesn't have to be perfect. The arms are just one crumpled up piece that is pushed into the back of the foil body.
  They are then given a piece of cheese cloth that has been dipped in fabric stiffener.

The kids drape the cheese cloth over the foil.  It looks really good if the material sort of drags off one side.  After the fabric dries (it takes at least a day), the foil is carefully removed (usually by a teacher...just crumple the foil tighter to pull it out) and a permanent marker is used to add a face.  They are really spooky because you can see right through them.
Thanks Joanne!

Monday, October 15, 2012

Simple Monsters


Today we made fun monsters by blowing paint with a straw.    We used liquid water colors but I think that any paint would work well.


When the monsters dried we added mouths with a permanent marker and google eyes (lots of google eyes :).  Simple, but very cute!


Sunday, October 14, 2012

Stone Soup

This week we made stone soup.  Before we made the stone soup we read several versions of the book and acted out the story using a big pot and play vegetables from our kitchen. Unfortunately, my phone was having problems and I lost those photos when I got my new phone (fortunately, I brought my phone into the Apple store just days before the warranty ended...that never happens to me). This is how we made stone soup:
We started by washing our stones very well.

Next we cut up the vegetables that we brought to add to the soup.


While the soup cooked, we went for a walk and found a huge hollow tree trunk that was perfect for making another batch of stone soup.
We came back to our classroom and tried our stone soup.  Initially, several children said they only wanted to smell the stone soup.  Eventually, everyone tried it and decided it was DELICIOUS!


Thursday, October 4, 2012

An Idea for Teachers with College Age Students

Okay, this post has nothing to do with my pre-k class. But, it is one of my best ideas so I wanted to share:)
Tonight I just hosted my 6th "Care Package Party for Our Babies."  The first party was hosted when my daughter Kiera was a freshman at the University of South Carolina.  She was 10 hours away and I missed her like crazy.  I decided to invite my friends, who were missing their first babies too, over for a party.  The invitation has changed very little over the years.  I sent the following email to my friends who had kids in college:

Please come put together a care package for your college student(s)

When: October 3rd at 7:00
Where: 207 Country Club Lane

Bring 30 of one type of small item (ie. candy bar, granola bar, nuts, a small toy, health item) and a simple appetizer to share.
* If you have multiple children in school, please bring a second set of items.

I will have boxes, tape and drinks and we will put together a box for each of our children and catch up on how they are all doing.

Can't wait to see you all!

Lyn


I count how many college kids we have all together and ask for that many treats from each mom.  Actually, everyone is really generous and often bring more than one treat per child. To get ready for the party, I go online and order boxes from the post office (the right size is the medium box).  I also buy tape and wine and beer (this year I actually decided to provide the food too because we have way too much food if everybody brings food ...I haven't quite figured that out)


I then put out lots of empty bins for people to fill with their treats...the first year everything was coordinated and cute... now I just use whatever I can easily borrow from my classroom:)

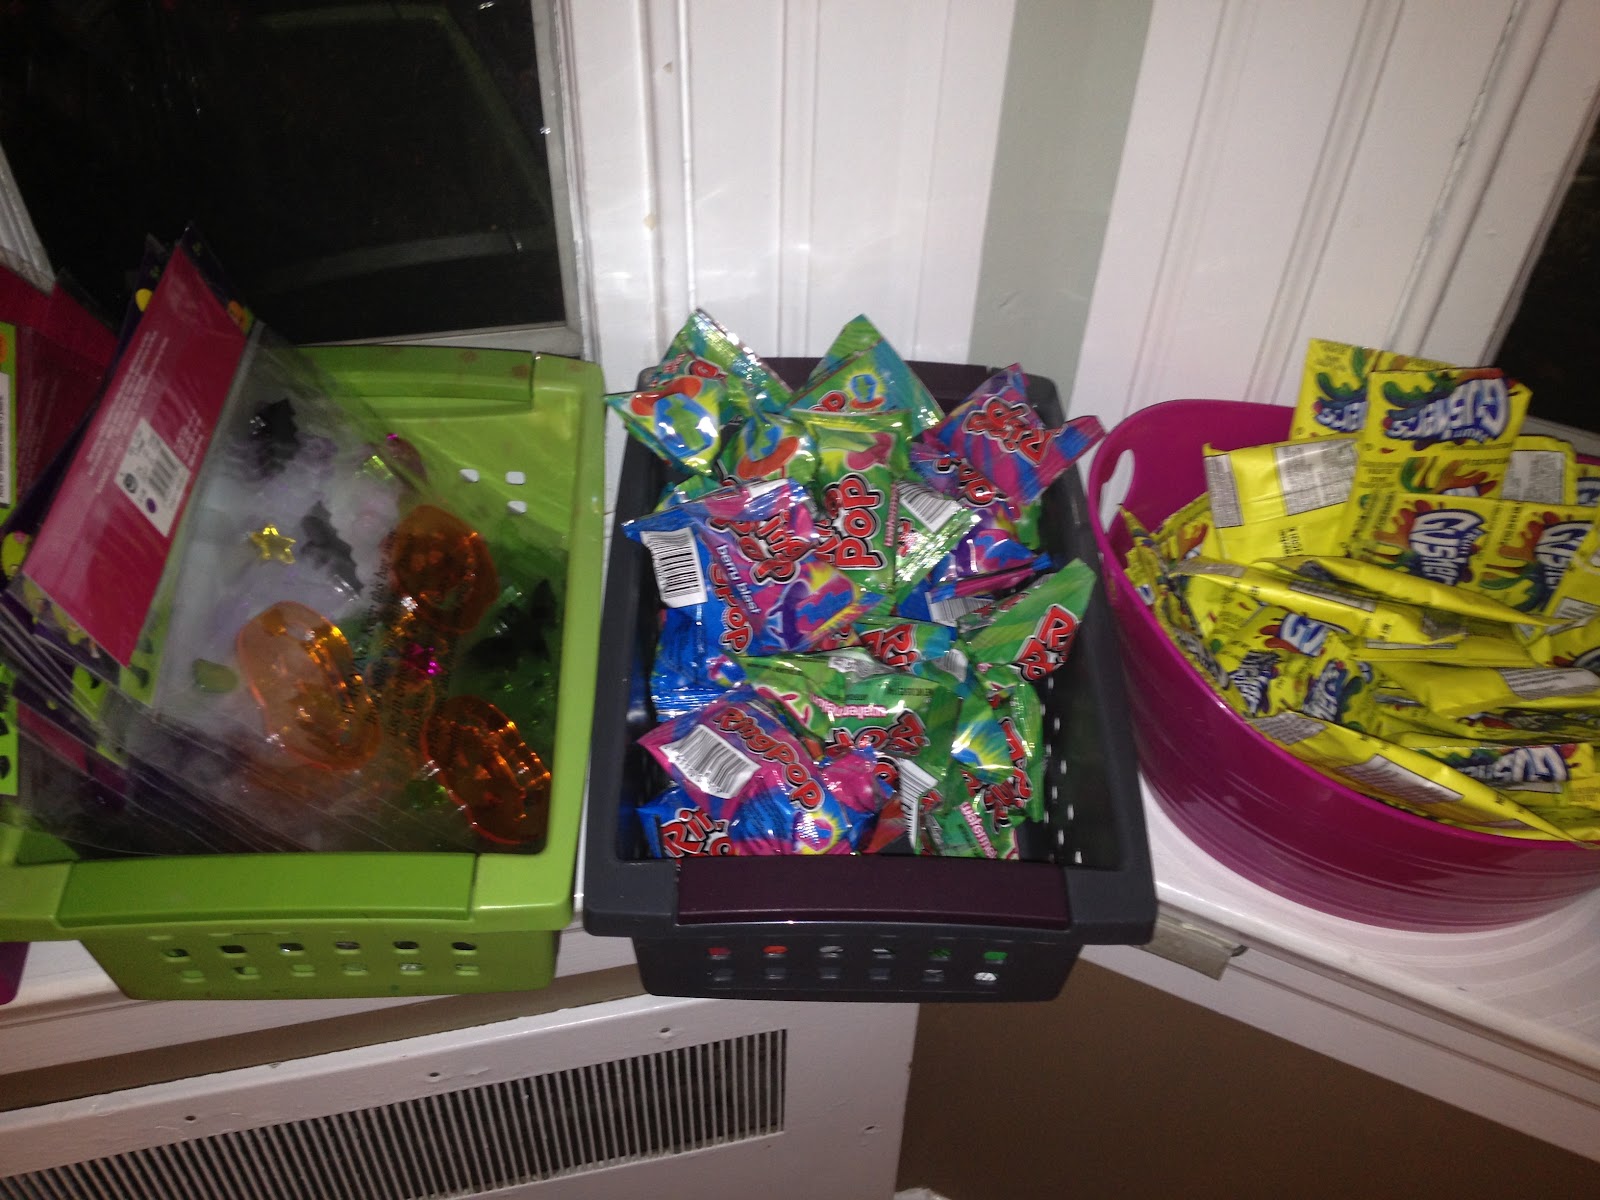
These are the treats I provided...Halloween gel stickers from Target, ring pops and gushers (my son's favorites). Other  popular items are Ramen noodles, candy bars, tissues, little toys, microwave popcorn.

As my friends come in they fill up a bin or two with their treats and then catch up with friends.

When everyone has arrived we start filling up boxes.


Our kids get a wonderful collection of treats.  My kids (and all the kids) LOVE this care package....it is the perfect box to share with roommates  and  others on the hall because it will include things that aren't necessarily your child's favorite. The moms also love getting together.  This is one of my favorite parties...both the Moms and kids are so appreciative (and I always love getting together with my friends! :)

Monday, October 1, 2012

What do you do with a Bilibo?!?


Five or six years ago my Mom bought 2 Bilibos for my classroom.  They are the kind of toy she loved to buy for my children when they were little - a simple toy that inspires creativity and  movement.  Today I took pictures of the many things the kids were doing with our Bilibos (we have 2 more in our room this month thanks to our toy sharing).


They can be a tricky balance beam.

The kids also love to just balance on one (and be taller).

They can hold a dog (or doll) when you are reading to it. 
They can be used for "scootching" across the floor
(or for scootching races:)


They make a cool mask.

They can be use for collecting cars.


They can show how centrical force works if you spin them when they are filled with cars.
Sometimes the cars even go flying out which is extra cool!

They can also be used to spin kids...this is probably how they are most frequently used.


The Bilibo is relatively expensive - almost $30 a piece.  However, they are virtually indestructible and  have provided hours of fun the kids in my class each year.  I also like them because  I think of my Mom whenever I see the kids enjoying the Bilibos.

Sunday, September 30, 2012

Apples

In September, we did a lot with apples.  We started by making observations about apples.


 We then made apple smiles for our snack.  They are made with 2 apple slices, mini marshmallows and peanut butter (this year I had to use carmel because of peanut allergies).  The kids love these.

 These apple trees are made in several steps. We start by doing green marble painting.  When they dry, the children cut along the lines I've drawn (with older kids, I had them use a tracer).  They then cut out the trunk and glue their collage together.  The last step is to add the apples with a pencil eraser.

 We of course had to do a graph.


The kids love this poem. I also typed it up and they added the picture clues (colored apples).  We practiced reading the poem as we pointed to each word ( I put a black dot under each word). This was the first paper that they brought home that they could "read" to their families...very exciting!


         Finally, after reading 10 Apples Up on Top, the kids did a self portrait and then decided how many apple they would put "on top."  The apples were little red circle stickers. Under the picture it says "_________ has ____ apples up on top!" I kept these in their portfolios so I could show parents at conferences how they were drawing themselves, writing their names and counting at the beginning of the year.