

Receive all updates via Facebook. Just Click the Like Button Below

Powered By | Blog Gadgets Via Blogger Widgets

HomeAboutContact

Wednesday, January 30, 2013

Hibernation

The kids loved making our hibernating bears.  


We started by "painting" paper bag caves that were glued onto paper plates with a mixture of shaving cream, white glue and white paint.  I put a squirt of each in a small dixie cup and then the children stirred the mixture with a popsicle stick and then used the stick to spread the mixture.  I got the idea from Sally at Fairy Dust Teaching.


I knew that my kids would like a 3D bear so we made bears with model magic.  I colored the model magic with brown food coloring and then did a sort of "directed sculpture lesson."   They are adorable!

We  also pretended to hibernate.  This is ALWAYS one of the kids' favorite activities.
First we brainstormed a list of animals that hibernate.  Then each child decided what animal they wanted to be.  
Bears hibernating under the table.
The kids' favorite part is that I signal spring by calling out a pair of rhyming words.  I start with other pairs of words such as "up-down" or "big-ball."  The kids keep sleeping ... until they hear the rhyming words.  They then slowly stretch and wake up and then crawl (or fly if they are a bat or ladybug) to find a snack.  I have snacks set up on napkins on the floor.  SO MUCH FUN! I can't remember where I first saw this idea, but I have been doing it for years and it is something the kids always remember.
These are hibernating bats!

Tuesday, January 29, 2013

New Website


It has been driving me crazy that our school did not have a website.  Unfortunately, we are a tiny school staffed mainly by middle-aged women who are not very tech savvy (at all!!)  Last weekend, my son just put together a website.  I am so excited!  Check it out here. I'm also excited that I actually sort of understand how it works and I'm going to try to tinker with it further.

On another note, the first picture in the slide show on my website is one of the photos I took for our handprint calendar we made as Christmas gifts for our family.  On first page of the calendar I put a picture of the child with painted hands and then wrote "Handmade With Love By__________" and the child printed his or her name.  SO CUTE!!!

Tuesday, January 22, 2013

Colorful Snowman

I love our colorful snowmen that were inspired by this poem that I saw on Mrs. Lee's blog:

We started by coloring coffee filters with drops of liquid water colors. The kids LOVED seeing the colors spread and blend (and it was good fine motor practice using the eye droppers).


file:///Users/lyngoff1/Desktop/e51e59c01b824e9907f650dcd721eb6f.jpg
When the filters had dried we glued them together and added details with permanent markers and stickers.  The snowmen look beautiful in the windows (from both the inside and outside!). Make sure you use glue sticks, I used white glue first and it changed the colors and looked really messy even when it dried).

We have other snowmen in our room.  These are our name snowmen.

This is our snowman poem.  The kids are doing such a great job recognizing some words and using clues to figure out others.


These simple Pinterest inspired snowmen are made with egg cartons, yarn, pipe cleaners and buttons.

Tuesday, November 27, 2012

Decorated Doll House

My kiddos absolute favorite toy to play with during the month of December is our doll house.  I put out a box of decorations (a little tree, wreaths, garland, plastic candy canes and so on) that I buy at Target after Christmas (or at the Dollar Store) and ticky tac and let them go wild.  Both the boys and girls LOVE decorating and redecorating the house.  I also give them little gingerbread ornaments and the gingerbread boy and girl finger puppets that I made. What fun it is to watch the creative adventures of the gingerbread family.

Thursday, November 22, 2012

Personalized Christmas Balls


Each year the teachers at our preschool make an ornament or small present for each of the children. We have made a LOT of adorable snowmen.  The criteria for choosing the ornament is that it has to be non-religious, it can't be very expensive and we have to be able to produce 100 of them in a couple hours (there are 9 teachers working). The idea for this year's ornament came from our director Joanne (who is the source for many of the ideas I share on this blog).  It was really simple and the ornaments came out beautifully.  We simply put a picture of each child into a plastic ornament.  The photo above really doesn't do the project justice.


First we traced around a plastic template and cut out the picture.  It is important that you leave a tab on the top.


We then put the date on the back of the photo with a sticker.  You could also glue pretty scrapbook paper on the back.


Next we wrapped the photo around a pencil...


and then slid the rolled picture into the top of the ball.


Once the roll is inside, we used the pencil to flatten the picture back out.
Adorable!  We tried adding a little bit of "snow" or glitter but it stuck to the sides of the ball and photo and took away from the whole effect.

I'm planning to make more for friends and relatives with new babies.

Friday, November 16, 2012

We Are Thankful

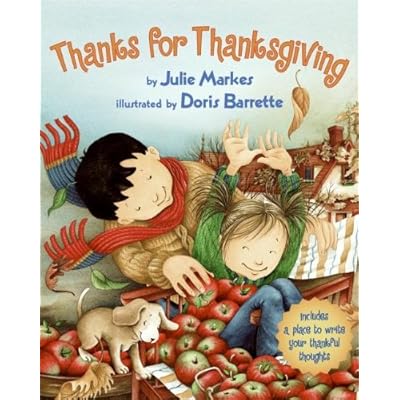
This is an idea I saw on last year on the Let's Explore Blog.  I love how they turned out,  I began by reading Thanks for Thanksgiving by Julie Markes.

After we generated a list of things we were thankful for, I spoke with each child individually during free play . Each child told me what they were thankful for.  Some could rattle off eight or more things without taking a breath.  Others needed prompting to think of more than 2 or 3 things. If they needed prompting, I asked about their favorite toy, or food or activity. I then asked the child to tell me which item(s) they were most thankful for.  I then typed up all of the poems and printed them onto watercolor paper that I had cut down to 8 1/2" x 11".  

Next I traced a large leaf pattern onto contact paper. I cut the contact paper and placed it over the words.  We then used liquid water colors to paint around (and over) the leaf.  When the paintings dried I pulled off the contact paper. 


Last year, many parents told me how special this project was to them.  It really captured what was important to their child at this moment in time.  

Unfortunately, the project did not go nearly as smoothly this year.  I used Discount School Supplies' "contact type" paper and when I went to pull it off, it took the letters too.  I ended up having to leave the plastic over the poem.  They still look good... sort of like a window, but next year I will use real Contact paper.

Monday, November 5, 2012

Election Fun Update

The campaign buttons my assistant and I will wear tomorrow.
         Today I told my class that they were going to chose one of the toys that would be in our classroom for the next month.  My assistant campaigned for Lego.  She explained that a vote for Lego meant that they would also get some new Lego.  I campaigned for the Sand Table and asked the constituents what they would want to dig for in the sandbox.  Suggestions included dogs and cats and jewels.  I promised that if they picked the Sand Table it would have toy dogs and cats and jewels (not sure I'll be able to keep that campaign promise because I only found little dogs and jewels among our toy and craft collections:).

During free play, many of the children chose to make posters and buttons for their preferred toy. There were also chants of  "Lego, Lego, Lego" and "Sand Table, Sand Table." The kids  are really excited about the election!

A Lego supporter (as evidenced by her giant sticker).
A Sand Box supporter.
Busy Making Campaign Posters.
Vote Lego!


After voting, each child will get an "I Voted" sticker.
Our Voting Booth is all ready for election day.


Early polling seems to suggest that we are going to have Lego in our class next month :)